Table of Contents
Ever looked at a stack of pancakes and thought, "This could be art"? Well, you're not alone! Forget those boring round breakfast discs; we're diving headfirst into the awesome world of pancake art designs for adults. This isn't your average Saturday morning cartoon pancake flip. We're talking about creating edible masterpieces that will impress your friends, family, and maybe even yourself. Think intricate patterns, detailed characters, and maybe even a portrait or two. This guide will take you through all the steps, from mixing the perfect batter to flipping your design like a pro. We will explore how to get the right batter consistency, how to color it like a master artist, and drawing tips that will make your creations pop. We'll also cover how to cook and flip your art without disaster striking. So, grab your griddle, your batter pens, and let's get ready to create some seriously cool pancake art.
Mixing the Perfect Batter for Adult Pancake Art Designs
Mixing the Perfect Batter for Adult Pancake Art Designs
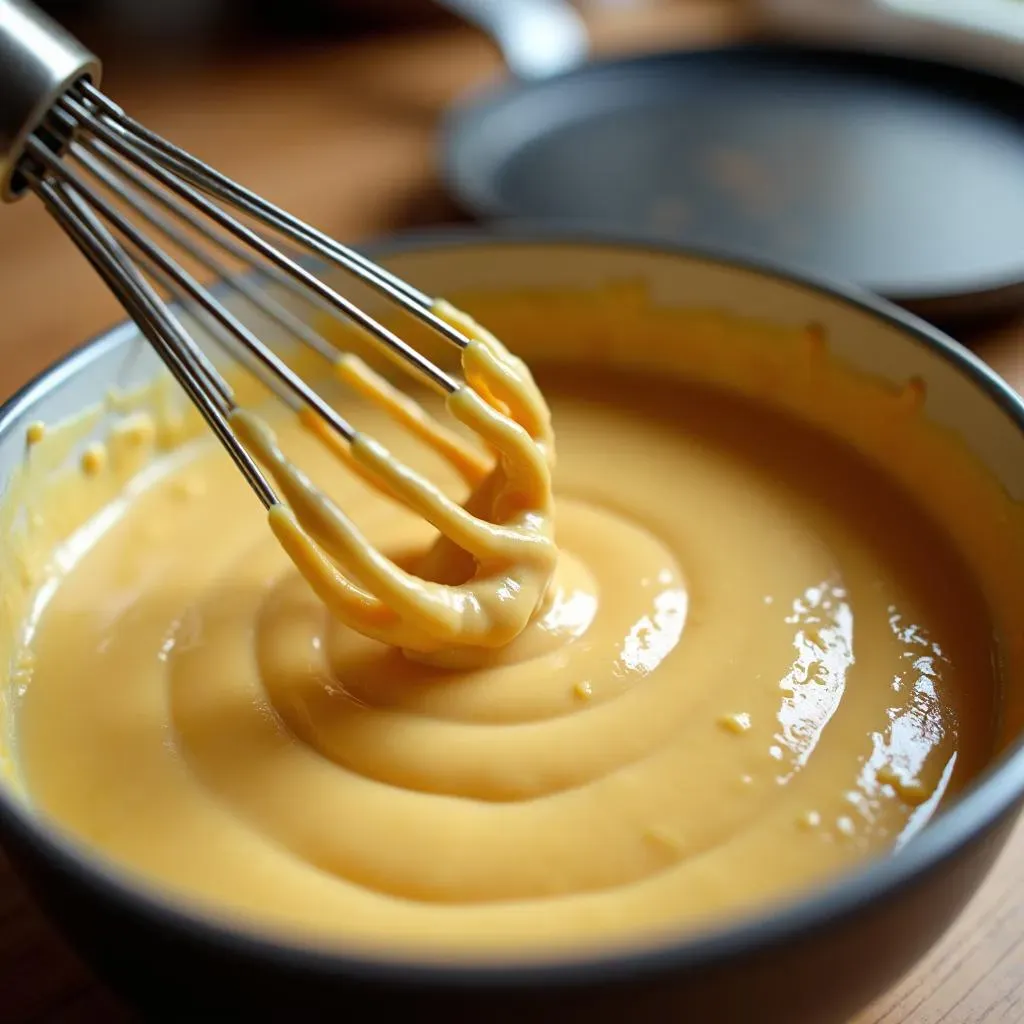
Alright, let's talk batter! This is where the magic starts, and it's way more crucial than you might think. We're not just aiming for any old pancake batter; we need a consistency that's going to let us draw. Think of it like this: you wouldn't use water to paint a masterpiece, right? You need something with a bit of body, something that flows smoothly but doesn’t spread like crazy on the griddle. The ideal consistency for pancake art is similar to ketchup or a thick cream. Too thin, and your lines will run all over the place. Too thick, and you'll be wrestling with the batter, trying to get it to move. It’s about finding that sweet spot where the batter is cooperative and holds its shape, that is the key for pancake art designs for adults.
How do we get there? It's all about the ratios. Start with your standard pancake mix. I like to use a basic recipe to have more control, but any pancake mix will work. The key is to add your wet ingredients first: milk, eggs, maybe a touch of melted butter if you're feeling fancy. Then, slowly incorporate your dry ingredients, whisking all the time to avoid lumps. Don't dump it all in at once! That's a recipe for disaster. Mix until just combined and the batter is smooth. This isn't a cake, we don’t want to overmix it. Once you have your batter, let it rest for a few minutes. This allows the gluten to relax, resulting in a more tender pancake. I've learned this the hard way after creating some rubbery pancakes, so trust me on this one. The perfect batter is your canvas, so treat it right.
Ingredient | Purpose | Notes |
|---|---|---|
Flour (All-purpose) | Provides structure | Can use gluten-free blends too |
Milk | Adds moisture, thins batter | Can use alternatives like almond milk |
Egg | Binds ingredients, adds richness | One large egg is usually enough |
Sugar | Adds a touch of sweetness | Adjust to your preference |
Butter (Melted) | Adds flavor and richness | Optional, can use oil instead |
Coloring and Drawing Techniques for Advanced Pancake Art
Coloring and Drawing Techniques for Advanced Pancake Art
Getting Colorful with Batter
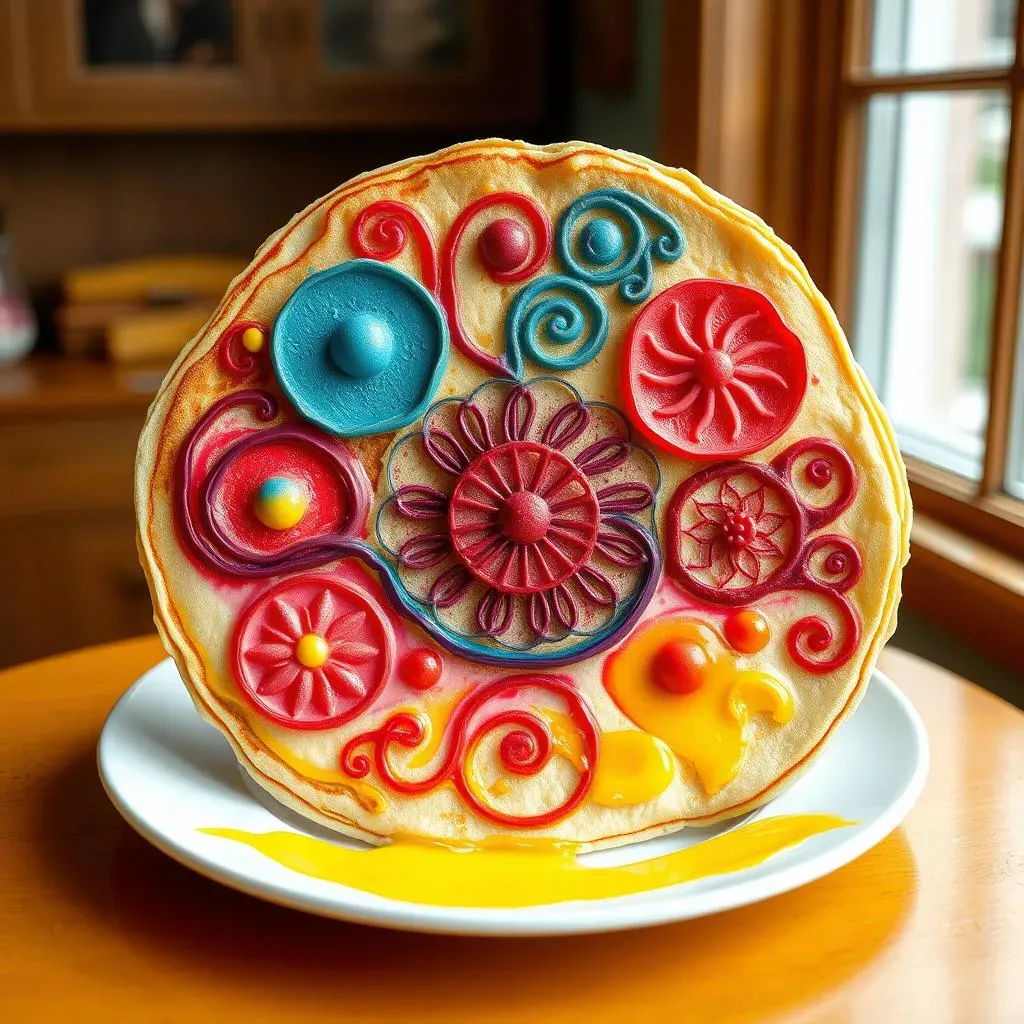
Okay, now that we've got our perfect batter, let's make it pop! We're not just sticking with plain old tan pancakes, are we? Absolutely not! This is where gel food coloring comes in. Liquid food coloring is a no-go; it’ll mess with the batter consistency and make it too thin. Gel is our best friend here. It's concentrated, so a little goes a long way, and it won't change the batter's texture. I like to put my batter into separate bowls and add a tiny amount of gel color at a time, mixing well until I get the shade I want. Remember you can always add more color, but you can't take it away, so start small. For instance, when I'm trying to make a vibrant red for a superhero pancake, I start with just a dot of red gel, then mix it in and add more if needed. You'll be surprised how vibrant you can make your batter with just a few drops.
Once your batter is colored and ready to go, you need a way to get it onto the griddle. Batter bottles or squeeze bottles are your go-to tools. I prefer bottles with fine tips because they allow me to create thinner lines and more intricate designs. You can find them at most stores or online, and they are a game-changer. Fill your bottles with different colors, and you're ready to become a pancake Picasso. Remember to keep the bottles clean to avoid colors mixing when you don't want it. Sometimes I even use a small ziplock bag and cut a tiny corner to pipe batter, if I can't find my bottles, it's a good alternative.
Drawing Like a Pro
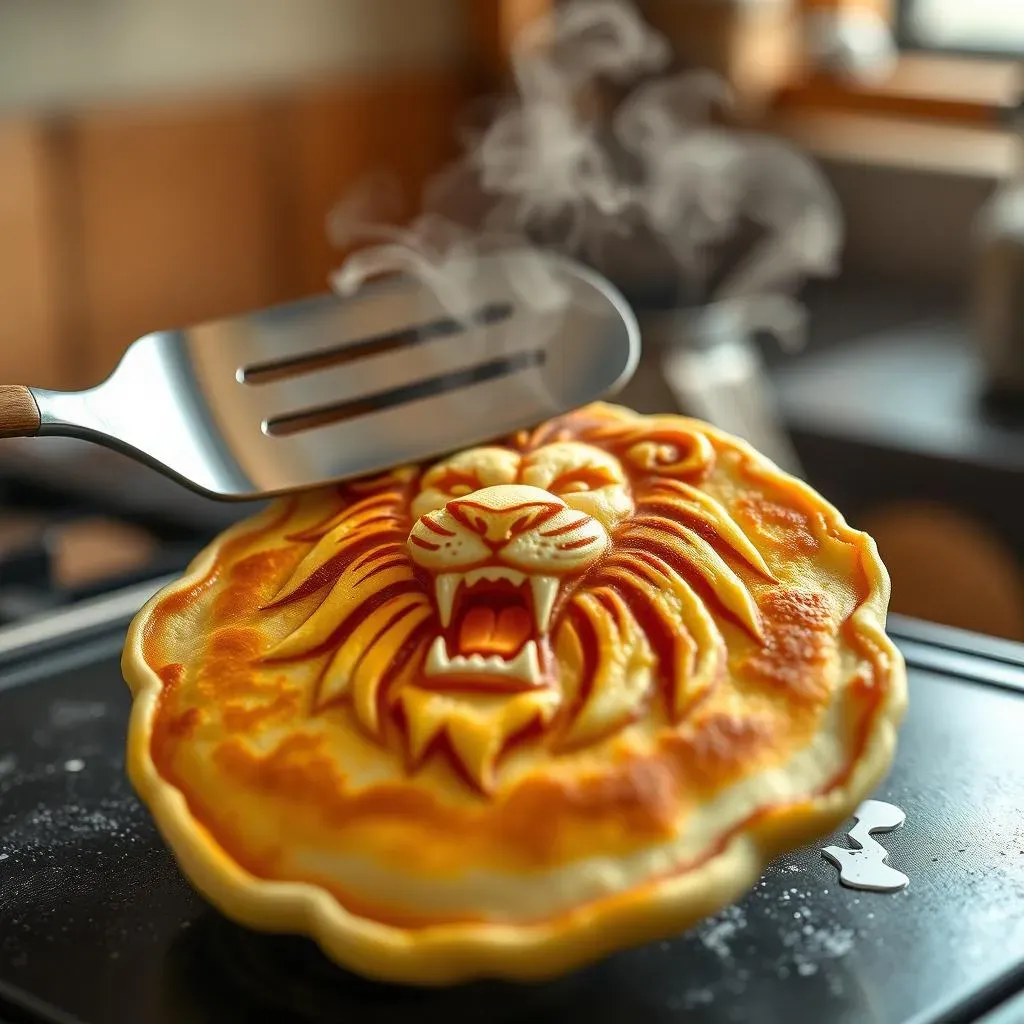
Now, for the fun part: drawing! Forget about trying to draw on a hot griddle; trust me, it’s a recipe for disaster. The key to detailed pancake art designs for adults is to draw on a cold griddle. This gives you all the time you need to create your design without the batter cooking. I like to use a hand towel or washcloth to rest my drawing hand. This helps keep it steady. Start by outlining your design with a darker color if you are using one, it will help you see the shape of what you are doing. Then, fill it in with lighter colors. Think of it like drawing on paper, just with pancake batter instead of ink. The most important part is to take your time. There is no need to rush, it's supposed to be fun and relaxing.
When drawing, try to keep the tip of your bottle slightly above the griddle. Don't let it touch the surface, or the batter will spread too much. If you want to create a thicker line, just squeeze the bottle harder. If you want thinner lines, use a lighter touch. Practice makes perfect, so don't get discouraged if your first few attempts don't look like masterpieces. I've had my share of pancake blobs, but it's all part of the learning process. The more you practice, the more comfortable you will get with the batter and the drawing process. You will soon be creating incredible pancake art designs for adults in no time!
Tool | Purpose | Notes |
|---|---|---|
Gel Food Coloring | Adds color to batter | Use sparingly, start with a tiny amount |
Batter Bottles | Dispenses batter for drawing | Fine tips for detailed work |
Hand Towel/Washcloth | Supports drawing hand | Keeps hand steady |
Cooking, Flipping, and Plating Your Adult Pancake Art Designs
Cooking, Flipping, and Plating Your Adult Pancake Art Designs
Alright, you've poured your heart into creating these amazing pancake art designs for adults, now it's time to cook them! Don't get nervous; it's easier than you think. First, heat your griddle to medium heat. You don’t want it too hot, or your pancakes will burn before they cook through. Once the griddle is warm, you can gently transfer your designs onto it. Now, this is crucial: you need to cook them slowly and patiently. Look for the edges to start turning golden brown and bubbles to form on the surface. These are signs that your pancake is ready to be flipped. It's like watching a tiny science experiment unfold right before your eyes. Remember, we're not rushing this; we're crafting edible art. The key here is to be gentle and not to rush the cooking process, otherwise, you can end up with a mess.
Flipping time! This is where many people get a bit anxious, but with a little practice, you will be a master flipper. Use a thin, flexible spatula to slide under the pancake. Make sure you get under the whole design, so it doesn't break when you turn it. Now, with a quick and confident motion, flip the pancake over. If you hesitate, it might fold or break. Don't worry if it's not perfect the first time; it takes practice. Once flipped, cook for another minute or two, until the bottom is golden brown and the pancake is fully cooked. The cooking process is as important as the drawing, so take your time and don't rush it. Once cooked, slide the spatula under the pancake again and gently drag it onto your plate. And there you have it: your edible masterpiece, ready to be admired.
Step | Action | Notes |
|---|---|---|
1 | Heat Griddle | Medium heat, not too hot |
2 | Transfer Design | Gently place on griddle |
3 | Cook | Until edges golden brown |
4 | Flip | Use thin spatula, quick motion |
5 | Cook Other Side | Until golden brown |
6 | Plate | Slide onto plate |