Table of Contents
Ever find yourself on a weekend morning, ready for a stack of fluffy pancakes, only to discover you're out of baking powder? It's a kitchen crisis, I know! But fear not, fellow breakfast enthusiasts. You absolutely can whip up amazing pancakes from scratch without that magic leavening agent. This article is your go-to guide for creating a delicious pancake recipe from scratch no baking powder needed. We'll skip the store-bought mixes and get down to the basics, using simple ingredients you probably already have in your kitchen. Forget flat, sad pancakes; we’re talking light, airy, and utterly satisfying. I'll walk you through each step, from gathering your ingredients to flipping those golden beauties. We'll also cover some secret tips and tricks to help you achieve pancake perfection, along with ideas to customize your breakfast masterpiece. So, grab your whisk, and let's get cooking! Prepare to be amazed at how easy and tasty homemade pancakes can be, even without baking powder.
Simple Ingredients for Baking PowderFree Pancakes
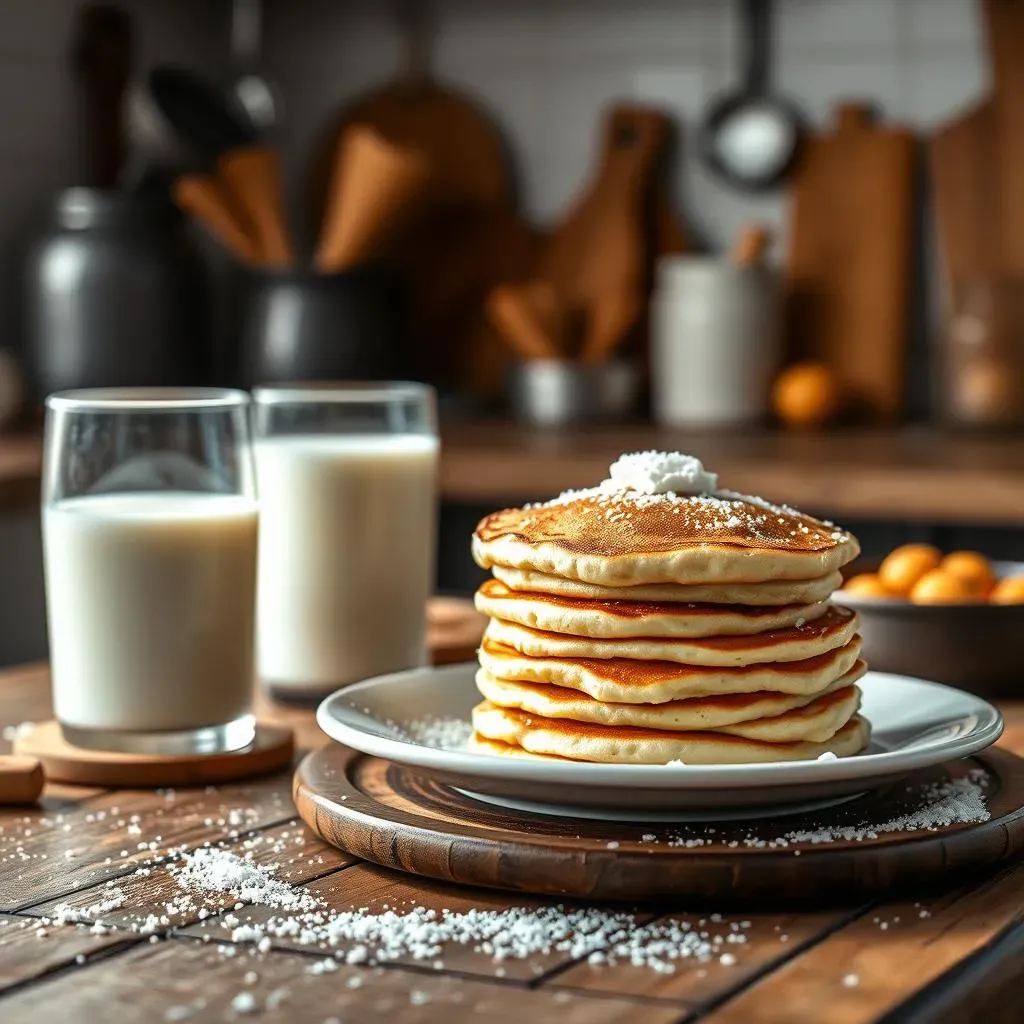
Simple Ingredients for Baking PowderFree Pancakes
The Core Four
so you're ditching the baking powder. That's cool, we can work with that. For this pancake recipe from scratch no baking powder, you'll only need a few basic ingredients. We're talking self-raising flour, which is kinda the secret weapon here, since it already has a bit of leavening power. Then you’ll need some eggs to bind everything together and add a bit of richness, milk to make it pourable, and a pinch of salt, to bring out the flavors. That’s it! No fancy stuff, just the essentials. It’s amazing how simple it is.
I remember the first time I tried making pancakes without baking powder, I was totally skeptical. I thought they’d be flat and dense, like hockey pucks. But honestly, they turned out surprisingly fluffy. It’s all about the self-raising flour and a little bit of technique, which we'll get into later. It's like magic, but without the need for a wand.
Ingredient Substitutions
Now, let's talk substitutions, because sometimes you’re missing an ingredient or just want to mix it up. If you don't have self-raising flour, you can make your own by mixing plain flour with a bit of baking soda and a touch of salt. For the milk, any kind will work - dairy, almond, soy, oat, whatever floats your boat. If you're feeling fancy, you could add a splash of vanilla extract for extra flavor, or a teaspoon of sugar if you like a sweeter pancake. The beauty of this recipe is that it's super flexible.
I once tried using coconut milk instead of regular milk, because my fridge was empty, and they came out with a subtle coconutty flavor that was actually really good. It was a happy accident, and it goes to show that you can experiment and still end up with delicious results. Don't be afraid to play around with the recipe and make it your own.
The Basic List
So here's the basic shopping list, if you are like me that need to write it down before heading to the kitchen.
- 2 cups of self-raising flour
- 2 large eggs
- 2 cups of milk
- Pinch of salt
That's it. Short and sweet. You probably have most of this already in your pantry, which is awesome. Now, let's get to the fun part: making the pancakes!
StepbyStep Guide to Fluffy Pancakes Without Baking Powder
StepbyStep Guide to Fluffy Pancakes Without Baking Powder
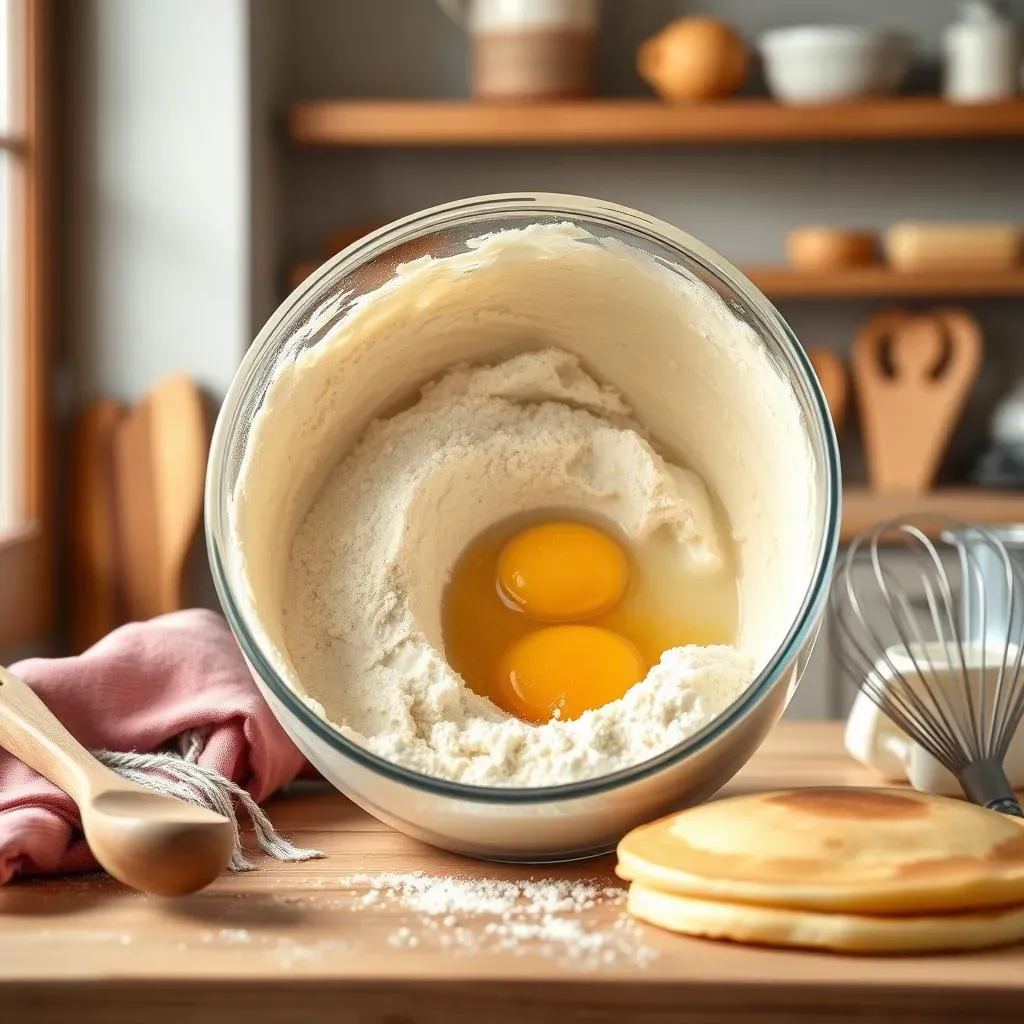
Mixing the Batter
Alright, let's get to the fun part. First, grab a big bowl, because we're making a proper batch of pancakes. Toss in your self-raising flour, and then add your pinch of salt. Give it a quick mix with a whisk, just to get those dry ingredients combined, no need to be too fussy. Now, make a well in the center of the flour, like you're building a tiny volcano. Crack your eggs into that well, and pour in about half of the milk. Start whisking from the center, gradually incorporating the flour into the wet ingredients. As the batter starts to form, slowly pour in the rest of the milk until you have a smooth consistency. Don't overmix, a few lumps are okay, we are not aiming for a perfectly smooth batter, that might make the pancakes tough. The key is to mix until everything is just combined. It should be thick, but pourable. Think of melted ice cream.
I remember once, I got so excited and overmixed the batter, and the pancakes were like rubber. Lesson learned: less is more when it comes to mixing. So, take it easy, and you'll be rewarded with fluffy goodness. Now, let that batter rest for a few minutes while you get your pan ready, this will let the flour absorb the liquid. This is a crucial step, so don't skip it.
Cooking the Pancakes
your batter is ready, and so are we. Put your non-stick pan over medium heat. Don’t go too high, or you'll end up with burnt pancakes that are raw in the middle. I've been there, it is not fun. Once the pan is hot, add a tiny pat of butter or a drizzle of oil. Let it melt and coat the bottom of the pan. Now, pour about a quarter cup of batter onto the hot pan for each pancake. You should see bubbles forming on the surface after a minute or two. When those bubbles start to pop, and the edges look set, it's time to flip. Use a spatula to gently flip each pancake, and cook for another minute or two on the other side, until they are golden brown. It is a good idea to press lightly with the spatula to ensure even cooking. Don't be tempted to flip them too early, or they might tear. You want them to be nice and golden, not pale and sad looking.
I always get a little thrill when I see those perfect golden-brown pancakes come off the pan. It's like a mini celebration, and you deserve to celebrate every single pancake you cook. Repeat with the remaining batter, and stack those beauties high. You're a pancake pro now!
Step | Action | Tip |
|---|---|---|
1 | Combine dry ingredients | Whisk gently |
2 | Add wet ingredients | Gradually mix |
3 | Let batter rest | A few minutes is enough |
4 | Heat pan and grease | Medium heat is key |
5 | Pour batter and cook | Flip when bubbles appear |
Tips and Tricks for Perfect Pancakes from Scratch
Tips and Tricks for Perfect Pancakes from Scratch
Heat Control
so you've got the batter down, now let's talk about the heat. This is where a lot of people go wrong. Medium heat is your best friend here. If the pan is too hot, your pancakes will burn on the outside and be raw in the middle. Too low, and they'll be pale and sad. You want that sweet spot where they cook evenly and get that beautiful golden-brown color. A good way to test if your pan is ready is to flick a tiny drop of water on it, if it sizzles and evaporates quickly, you are good to go. This is one of those tips that seems small, but it makes a big difference.
I once tried to rush the process by cranking up the heat, and, oh boy, the results were disastrous. It was like charcoal on one side and raw batter on the other. I learned my lesson that day. Patience is key, even if you are hangry. Just remember, low and slow is the way to go for perfect pancakes every single time, and you'll avoid the pancake fail I had.
The Flip
Next up, the flip, a crucial moment in pancake history. Don’t be too eager! You need to wait until those little bubbles start to form on the surface and pop. That's your signal that the bottom is set and ready for action. Slide your spatula gently under the edge of the pancake and flip it with confidence. Don't be shy, but also don't be too aggressive, or you'll end up with a pancake disaster. You want a smooth, controlled flip, not a pancake catapult. If you are unsure if the pancake is ready to flip, try to lift it slightly with the spatula, if it doesn't stick to the pan and looks golden brown, it is ready to flip.
I used to be terrified of flipping pancakes, and they would often end up crumpled and torn. But with practice, it gets easier. Now, I flip them like a pro, and you will too. It’s like a little dance between you and the pancake. Just remember to be gentle and confident, and you'll have a stack of perfectly flipped pancakes in no time. Trust me, it's a skill worth mastering.
Don't Overmix
I know I already mentioned this, but it's so important that it's worth repeating: don’t overmix the batter! A few lumps are perfectly fine. In fact, they're a good thing. Overmixing develops the gluten in the flour, making your pancakes tough and chewy. You want light and fluffy, not dense and rubbery. So, just mix until everything is combined, and then leave it be. It's better to have a few lumps than to overmix and ruin the whole batch. It's like a gentle hug, not a wrestling match.
A friend of mine once told me, "Treat your pancake batter like you're handling a delicate flower." I thought it was a bit dramatic, but she had a point. The less you mess with it, the better the pancakes will be. So, just be gentle, and your batter will reward you with light and fluffy pancakes. It's all about that delicate touch.
Resting the Batter
This is a crucial step that many people skip, but it makes a huge difference. After mixing your batter, let it rest for about 5-10 minutes. This allows the flour to fully absorb the liquid, and the gluten to relax. The result? A lighter, fluffier pancake. It's like a mini spa day for your batter, and it really pays off. It's like letting your batter take a little breather before the big performance. Don’t rush it, let it rest, and you will see the difference.
I used to be so impatient that I would skip this step, and my pancakes would be good, but not great. Then I started letting the batter rest, and it was a game-changer. They were noticeably fluffier and lighter. It's amazing how a few minutes of rest can make such a big difference. Trust me on this one, it’s worth the wait.
Use a Non-Stick Pan
Using a non-stick pan is a game-changer. It prevents the pancakes from sticking and tearing, making the flipping process much easier. If you don't have a non-stick pan, you can use a regular pan, but make sure to grease it well with butter or oil to prevent sticking. However, a good non-stick pan will make your life so much easier. It's like having a superpower for pancake making, and you deserve it.
I remember the days before my non-stick pan, when I would spend ages trying to scrape the pancakes off the pan, it was a nightmare. Now, they slide right off like a dream. It's a small investment that will save you a lot of time and frustration. A non-stick pan is a must-have for any serious pancake lover.
Tip | Description | Why it Matters |
|---|---|---|
Medium Heat | Cook on medium heat | Prevents burning and ensures even cooking |
Gentle Flip | Flip when bubbles form | Avoids tearing and ensures a perfect flip |
Don't Overmix | Mix until just combined | Keeps the pancakes light and fluffy |
Rest the Batter | Let batter rest 5-10 minutes | Allows for better liquid absorption |
Non-Stick Pan | Use a non-stick pan | Prevents sticking and makes flipping easier |
Customizing Your No Baking Powder Pancake Recipe
Customizing Your No Baking Powder Pancake Recipe
Add-Ins: The Fun Part
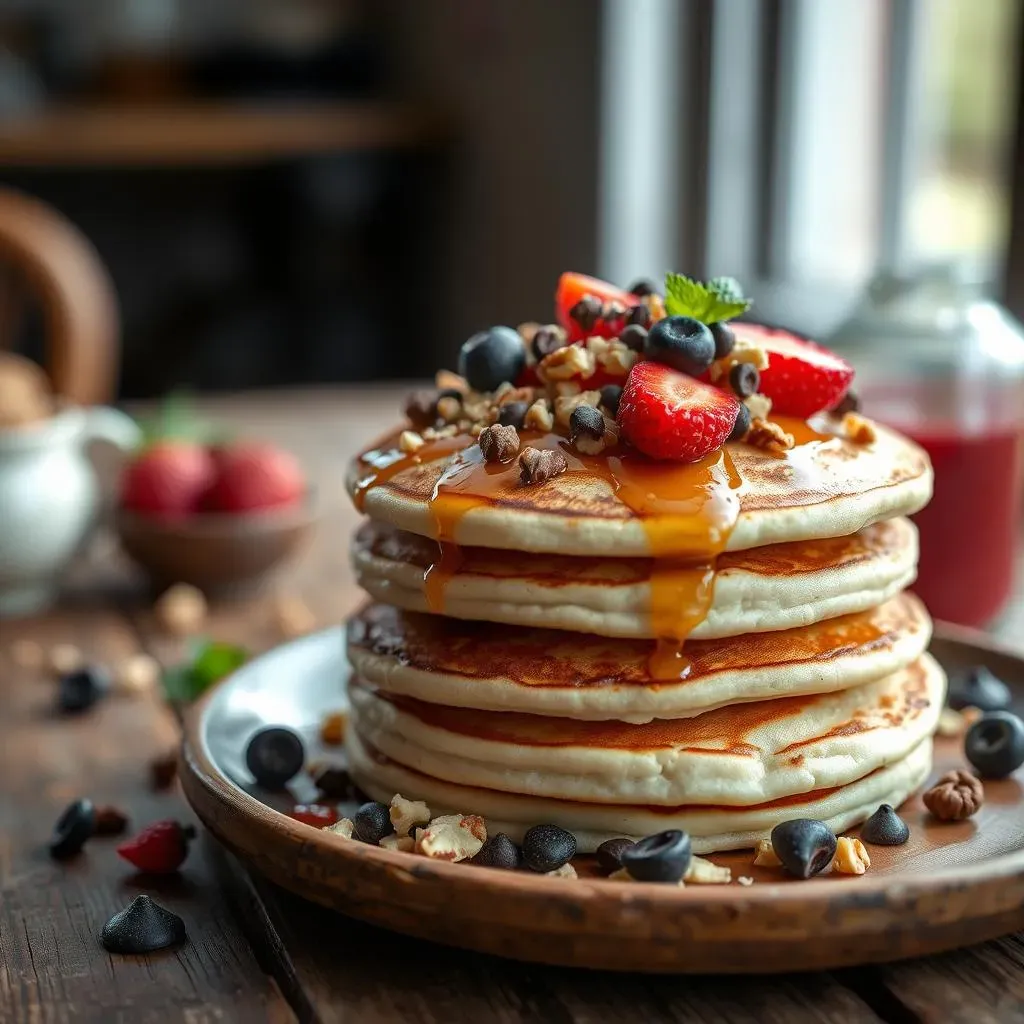
Alright, so you've nailed the basic pancake, now let's get creative. This is where you can really make these pancakes your own. Think of the batter as a blank canvas, ready for your delicious masterpieces. Want some sweetness? Throw in some chocolate chips or a handful of fresh blueberries. Craving a bit of crunch? Chopped nuts or a sprinkle of granola will do the trick. If you're feeling fancy, a swirl of cinnamon or a dash of nutmeg can add a warm, cozy flavor. The possibilities are endless, really. It's all about what you're in the mood for, and what goodies you have in your kitchen.
I once added some mashed banana to the batter, and it made the pancakes super moist and delicious. It was like a little tropical vacation on a plate. So don't be afraid to experiment and try different combinations. You never know what delicious creations you might come up with. It's like a treasure hunt, but the treasure is delicious pancakes.
Flavor Enhancements
Looking to boost the flavor? Let's get into it. A splash of vanilla extract can add a lovely touch of sweetness and warmth. If you're a fan of citrus, a bit of lemon or orange zest can brighten things up. For a more savory twist, try adding some herbs like rosemary or thyme. It might sound weird, but it's actually quite tasty. You can also use different kinds of milk to change the flavor profile. Coconut milk adds a subtle tropical taste, while almond milk gives it a nutty undertone. The key is to have fun and play around with different flavors. It’s like being a chef in your own kitchen, and the only limit is your imagination.
My friend once added a pinch of cardamom to her pancakes, and it was surprisingly delicious. It added this exotic, warm note that was just incredible. It made me realize that there are so many different ways to spice up your pancakes. So, don’t be afraid to get adventurous and try new things. You might just discover your new favorite flavor combination.
Add-In | Flavor Profile | Why it works |
|---|---|---|
Chocolate Chips | Sweet and Rich | Melts into pockets of gooey goodness |
Blueberries | Fruity and Tart | Adds a burst of flavor and moisture |
Chopped Nuts | Crunchy and Nutty | Adds texture and richness |
Cinnamon | Warm and Cozy | Enhances the overall flavor |
Lemon Zest | Bright and Zesty | Adds a touch of freshness |
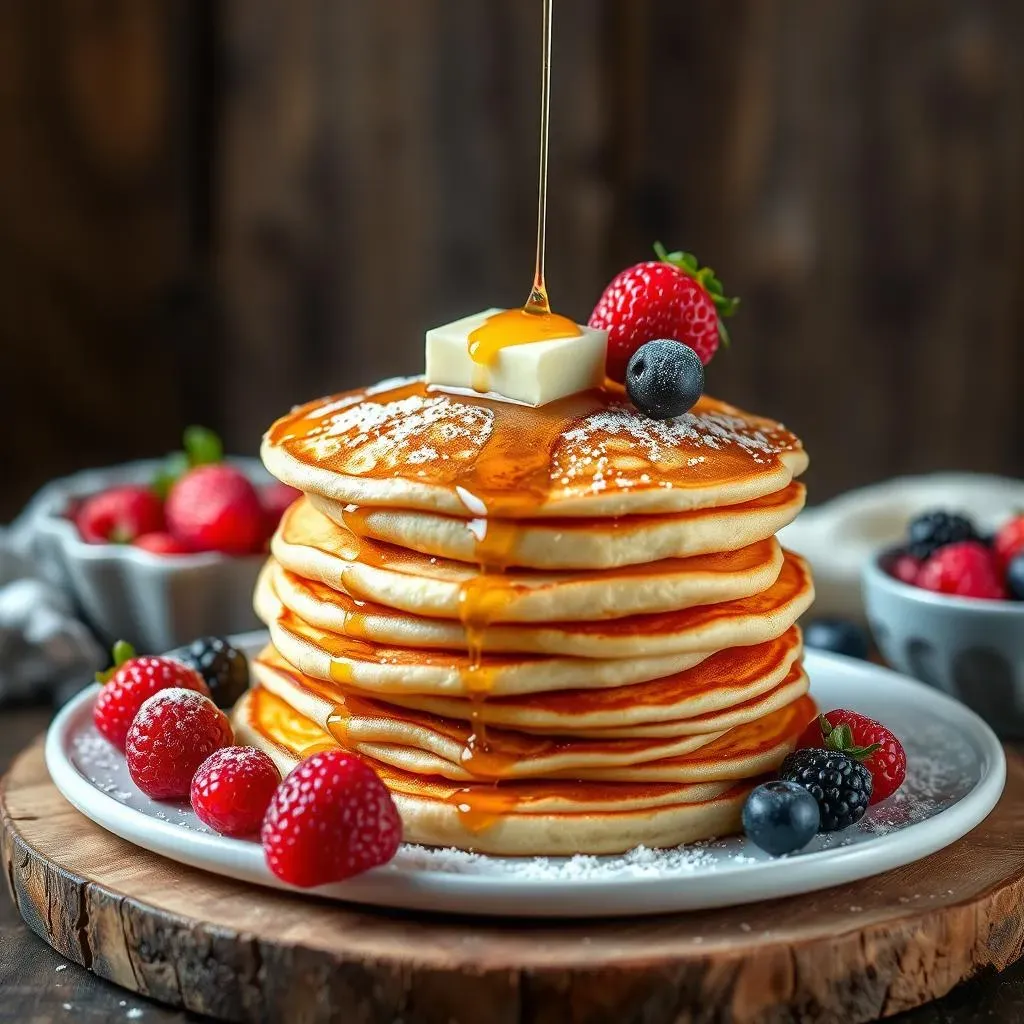
Toppings Galore
your pancakes are cooked, they are fluffy, and now for the grand finale: toppings. This is where you can really go wild. Classic maple syrup and a pat of butter are always a good choice, but why stop there? Fresh fruit like berries, bananas, or sliced peaches can add a burst of freshness and natural sweetness. A dollop of whipped cream or a scoop of ice cream can turn your pancakes into a decadent dessert. For a bit of crunch, sprinkle on some chopped nuts, granola, or even some toasted coconut flakes. If you're feeling extra indulgent, drizzle some chocolate sauce or caramel over the top. The sky's the limit, and it’s all about making your pancakes exactly the way you like them.
I’m all about a good drizzle of honey, a sprinkle of cinnamon, and some fresh berries. It’s my go-to combo, and it never disappoints. But sometimes I like to mix it up and try something new. It’s fun to experiment and see what combinations work best. Remember, toppings are not just an afterthought; they are an essential part of the pancake experience. So, go ahead and pile them on, and make your pancakes truly unforgettable.
The Sweet Success of Baking Powder-Free Pancakes
So, there you have it – a foolproof way to enjoy delicious, fluffy pancakes even when your baking powder supply has mysteriously vanished. This pancake recipe from scratch no baking powder proves that you don't need fancy ingredients or complex steps to create a fantastic breakfast. From the simple mixing to the satisfying flip, making pancakes from scratch is a rewarding experience. Remember, the key is in the technique: a good whisk, a hot pan, and a little patience go a long way. Now that you've mastered the basics, feel free to experiment with different add-ins and toppings. Whether you prefer berries, chocolate chips, or a simple drizzle of maple syrup, your homemade pancakes are sure to become a weekend favorite. Don't forget to share your creations and any tips you discover along the way, happy cooking!